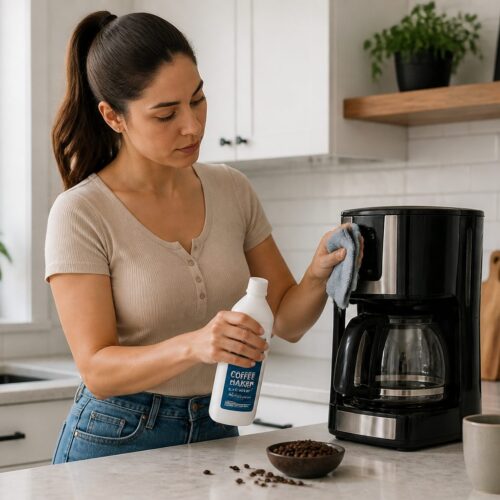


How to clean a coffee maker water reservoir depends on its design, which is easy to overlook because the tank is separate from the carafe and brew basket.
The right method depends on whether the tank lifts out, has a lid or filter, and can safely be washed in a sink.
Use the owner’s manual as the authority for cleaners, removable parts, and descaling.
A generic vinegar recipe or dishwasher suggestion can be wrong for a particular model, so this guide focuses on safe habits that apply without assuming every machine is built the same way.
Identify the reservoir design before cleaning
First determine whether the reservoir is removable.
Some machines have a tank that lifts from its base, while others use a fixed opening that is part of the appliance housing.
Unplug the machine before cleaning any area where water could reach electrical components, and let hot parts cool.
Keep the appliance base and power cord away from the sink, even when the tank itself is removable.
Look for a water-level window, a lid, a mesh screen, a float, or a filter attachment.
These small pieces may collect residue and may have separate instructions for removal or replacement.
Check the manual for the exact terms “reservoir,” “water tank,” and “water filter.” Manufacturers sometimes distinguish a removable tank from the internal water path, which may require a separate maintenance cycle.
If you cannot find the manual, search the manufacturer’s official support pages using the model number printed on the appliance.
Avoid relying on instructions for a similar-looking coffee maker because controls and materials may differ.
Clean a removable reservoir with a gentle routine
Empty any standing water and remove the reservoir only if the design allows it.
If a filter, lid, or insert detaches according to the manual, set those pieces aside so you can clean each approved part separately.
Wash an approved removable tank with the cleaner and method specified by its maker.
If the instructions allow mild dish soap and hand washing, use a soft cloth or sponge, then rinse until no suds or scent remain.
Avoid abrasive pads, scouring powders, and sharp tools unless the manufacturer explicitly approves them.
Scratches can make residue harder to see and may damage a surface or seal.
Pay attention to corners, seams, and the area around the outlet where water leaves the tank.
Use a soft brush only if it fits without force and the instructions do not prohibit it.
Rinse the reservoir with clean water after washing.
Leftover detergent can affect the water that enters the brew cycle, so do not treat a quick splash as a substitute for a thorough rinse.
Let the parts air-dry if the manual recommends drying before reassembly.
Refit the tank, lid, and inserts only when they are positioned correctly; forcing a misaligned reservoir can affect how it seats or dispenses water.
Care for a fixed or hard-to-reach tank
A fixed reservoir should not be filled with soapy water and scrubbed blindly unless the manufacturer gives that direction.
Water can enter parts that are not intended to be immersed, and narrow openings can make it difficult to rinse away cleaning products.
Follow the cleaning instructions for the model, including any designated clean cycle.
A manufacturer may distinguish surface cleaning from descaling the internal water path, and those tasks use different procedures.
For an opening that permits access, wipe the visible interior with a clean, soft cloth if the manual allows it.
Do not push cloths, cotton swabs, or tools into tubes or valves where they could become lodged.
If you see persistent dark spots, slime-like residue, or an odor that remains after a permitted cleaning, stop brewing and contact the manufacturer’s support service for model-specific guidance.
A hidden internal component may need attention beyond routine reservoir care.
Reservoir washing is not the same as descaling
Washing removes surface soil from parts that can be reached; descaling addresses mineral deposits in the internal water path.
A machine may need one, the other, or both, depending on use, water, and the manufacturer’s schedule.
Do not assume that a clean-looking tank means the whole machine is free of mineral buildup.
Conversely, running a descaling cycle does not replace wiping or washing a removable reservoir when its manual calls for that care.
Some manufacturers specify a cleaning solution, a dilution, or a sequence of brew cycles.
Do not substitute vinegar, baking soda, bleach, or another household product unless the exact manual permits it.
A cleaning cycle may require emptying and refilling the tank more than once.
Follow the prescribed rinse steps so that cleaning solution does not remain in the machine’s water path.
Habits that keep the tank easier to maintain
- Empty leftover water when the manual recommends it, especially if the machine will sit unused.
- Use fresh water for brewing rather than leaving an old fill in the reservoir for an extended period.
- Wipe splashes from the exterior and around the lid with a clean cloth.
- Keep the tank covered as designed and avoid storing utensils or other objects inside it.
- Follow the cleaning and filter replacement schedule in the manufacturer’s instructions.
These habits are simple, but they reduce the chance that stale water or visible residue will go unnoticed.
They also make a periodic wash easier because there is less dried-on material to address.
Avoid adding flavorings, milk, or any liquid other than water to the reservoir unless the machine is specifically designed for it.
The tank and internal water path are intended for the liquids stated in the manual.
Troubleshooting residue, odor, or cloudy water
A small water mark can be mineral residue, detergent film, or another deposit, and appearance alone may not identify its cause.
Use the manufacturer’s method for the surface rather than applying a stronger cleaner by guesswork.
If water looks cloudy after cleaning, rinse again and inspect whether soap remains on the tank.
If cloudiness persists or appears during normal use, stop and check the manual or contact the manufacturer before brewing another pot.
For visible growth, clean only with a method approved for the reservoir and inspect any removable filter or insert named in the manual.
Do not combine cleaners or use bleach unless the manufacturer explicitly directs it for that model.
When the tank cannot be removed and the affected area is inaccessible, do not dismantle the appliance unless the manufacturer provides a procedure.
Service guidance is safer than probing around internal tubing.
Questions readers ask
If the reservoir is removable and the manual permits it, wash it as directed, rinse it thoroughly, and let it dry before reinstalling; do not immerse or scrub a fixed reservoir unless the manufacturer allows it.
The best method is the one in the owner’s manual for that model, because reservoirs differ in whether they detach, what cleaners they permit, and how they should be rinsed.
Stop using the machine until the reservoir is clean, then follow the model’s cleaning instructions; if visible growth remains or you cannot reach it safely, consult the manufacturer rather than improvising a chemical treatment.