
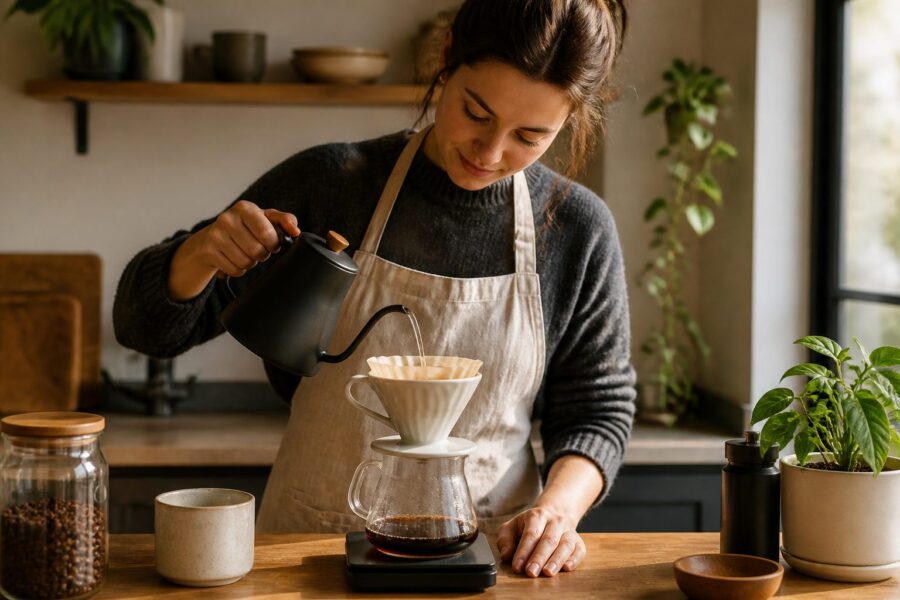
A repeatable pour-over routine begins with a measured dose, an evenly prepared coffee bed, and a pour that wets all the grounds; If you are learning how to brew pour over coffee, keep the first recipe simple; change one variable at a time so you can tell whether grind, dose, or pouring caused a different cup.
You do not need a special kettle or a complicated sequence to start; A dripper, compatible filter, coffee, hot water, and a cup are enough, while a scale and timer make it much easier to repeat a brew.
What you need for a basic pour-over
Set the brewer securely over a mug or carafe that can hold the finished drink; Check that the filter shape fits the dripper, since a filter that collapses or sits unevenly can interfere with water flow.
A burr grinder gives you a convenient way to adjust the grounds, but pre-ground coffee can work; Choose a grind described as medium or medium-fine as a starting point, then adjust by taste and by how quickly the water passes through the bed.
A gooseneck kettle helps direct a controlled stream, although a regular kettle can also work if you pour carefully; A scale measures coffee and water more reliably than tablespoons, whose volume changes with grind size and how tightly the spoon is filled.
- Pour-over dripper and a matching filter
- Coffee beans or ground coffee
- Hot water and a kettle
- A cup or carafe
- A scale and timer for repeatable adjustments
Choose a starting coffee-to-water ratio
A useful starting point is 1 gram of coffee for about 16 to 17 grams of water; For example, 20 grams of coffee with 320 grams of water gives a medium-strength brew to evaluate; it is a starting recipe, not a rule that suits every bean or preference.
Put the empty brewer and cup on the scale, tare it, add the coffee, then tare again before pouring water; If your scale displays only whole grams, that is still useful: consistency matters more than displaying extra decimal places.
Without a scale, use the same spoon and the same fill each time, and keep the water volume consistent; A tablespoon measure is less precise because coffee density varies, so treat the first cup as a baseline and adjust gradually rather than assuming a universal spoon-to-cup conversion.
| Coffee dose | Water at 1:16 | Water at 1:17 |
|---|---|---|
| 15 g | 240 g | 255 g |
| 20 g | 320 g | 340 g |
| 25 g | 400 g | 425 g |
The table translates the ratio into practical batches; Choose one column and repeat it for several brews before deciding whether you prefer a slightly stronger or lighter cup.
Prepare the filter and coffee bed
Place the filter in the dripper and rinse it with hot water; Rinsing helps the paper sit against the brewer and can reduce papery flavor; discard the rinse water from the cup before brewing.
Grind shortly before brewing when possible, then add the grounds and gently level the bed; A level surface gives the water a more even path through the coffee; avoid packing or pressing the grounds down.
Heat water until it is hot but not violently boiling at the moment it reaches the coffee; Many recipes use water just off the boil, and a thermometer lets you record a temperature that you can repeat or adjust.
Pour in a steady sequence
Start a timer when water first touches the coffee; Pour a small amount over the grounds to wet them evenly, using roughly twice as much water as coffee for this initial bloom; for a 20-gram dose, that means about 40 grams of water.
Let the wet coffee sit briefly while gas escapes, then continue pouring in controlled circles; Keep the stream low enough to avoid splashing, and avoid pouring directly against the paper because water can run down the sides without passing through much coffee.
For a simple two-stage brew, add water until the scale reaches about half of the total, pause as the level falls, then pour the remaining water in a second controlled stage; The pause is a practical way to keep the brewer from overflowing; it is not necessary to chase a decorative pouring pattern.
- Wet and bloom the grounds with a small first pour.
- Pour slowly across the coffee bed, stopping before the dripper fills too high.
- Add the remaining water in one or two steady pours.
- Let the bed drain, then note the total brew time and taste.
Different drippers and filter papers drain at different rates, so one exact finish time cannot define every good cup; Use time as a clue alongside taste, not as a score that the brew must hit.
Adjust the cup by changing one variable
If the coffee tastes sharp, thin, or unfinished to you, try grinding a little finer or making the pour more even; These changes can increase contact between water and coffee, but change only one at a time so you know what helped.
If the cup tastes harsh or drying, try a slightly coarser grind or a gentler pour; A brew that drains unusually slowly may have a fine grind, a clogged filter, or excessive agitation; check these before changing the coffee dose.
If the flavor is pleasant but weak, keep the grind and pouring pattern fixed and use a little more coffee for the same water amount; If it is too intense, reduce the dose or add a small amount of hot water after brewing, then record which version you prefer.
A tasting note is more useful than a vague verdict; Write down the coffee dose, water amount, grind description, and whether the cup seemed sour, bitter, weak, or balanced; that gives the next brew a clear adjustment to test.
Common setup questions
A paper filter and a dripper are the usual setup, but a clean, food-safe filter held securely over a vessel can function as a basic substitute if it allows water to pass without spilling; Take care with hot water and do not use a filter material that is not intended for food contact.
A metal filter behaves differently from paper because it allows more oils and fine particles into the cup; It may create a fuller texture and more sediment, so use the filter that matches the kind of cup you want rather than expecting identical results.
A dripper gives you direct control over the pour, while an automatic machine handles that step; Fresh coffee, a suitable grind, and a consistent ratio matter with either approach.
A repeatable routine beats a perfect-looking pour
Begin with a ratio you can measure, rinse and seat the filter, wet the coffee evenly, and pour without flooding the dripper; Keep a brief note of the recipe and taste, then make a small adjustment on the next brew.
Once the basic sequence feels familiar, experiment with grind, dose, and water temperature separately; That turns an inconsistent morning cup into a process you can understand and repeat, even when you later switch beans or brewers.
Use a matching filter and dripper, start with about 1 part coffee to 16 or 17 parts water, wet the grounds evenly, then pour in a controlled stream; Keep the recipe fixed for a few brews and adjust one variable at a time.
A practical starting ratio is 1 gram of coffee to 16 to 17 grams of water; For example, 20 grams of coffee pairs with about 320 to 340 grams of water; adjust the ratio to your taste.
Use the same spoon measure and water volume each time, understanding that spoon measurements are less precise than weighing; Keep the method consistent and adjust by tasting the result.
Need amounts for your dripper? The Coffee Brewing Ratio Calculator calculates them for pour over.