
Soil spectroscopy is a powerful tool for precision agriculture, offering rapid and cost-effective analysis of soil properties. Accurate soil sampling is essential for reliable spectroscopic results, and auger sampling is a common method for collecting soil samples. This article provides a step-by-step guide to auger sampling techniques for soil spectroscopy, ensuring you obtain representative samples for accurate analysis.
Mastering these techniques will improve the quality of your data and inform better management decisions. Proper auger sampling can greatly enhance the value of soil spectroscopy in your precision agriculture practices.
We will cover everything from choosing the right auger types to avoiding contamination and preparing samples for analysis. By following these guidelines, you can ensure that your auger sampling soil spectroscopy provides meaningful insights into your soil’s health and composition.
Choosing the Right Auger for Soil Sampling
Selecting the appropriate auger is the first step in effective soil sampling for spectroscopy. The type of auger you choose depends on the soil type, desired sampling depth, and the number of samples you need to collect.
There are several auger types available, each designed for specific soil conditions and sampling needs. Understanding the characteristics of each auger type will help you make an informed decision for your specific application.
For loose, sandy soils, a bucket auger is often the best choice. Its open design allows for easy collection of unconsolidated material, preventing the sample from collapsing before it can be retrieved.
In contrast, for compacted or clay-rich soils, a screw auger is more effective. The screw design helps to break up the soil and draw it up to the surface, making it easier to collect a representative sample.
For deeper sampling, consider using an extension rod with your auger. This allows you to reach greater depths without having to dig a pit, saving time and effort while maintaining sample integrity.
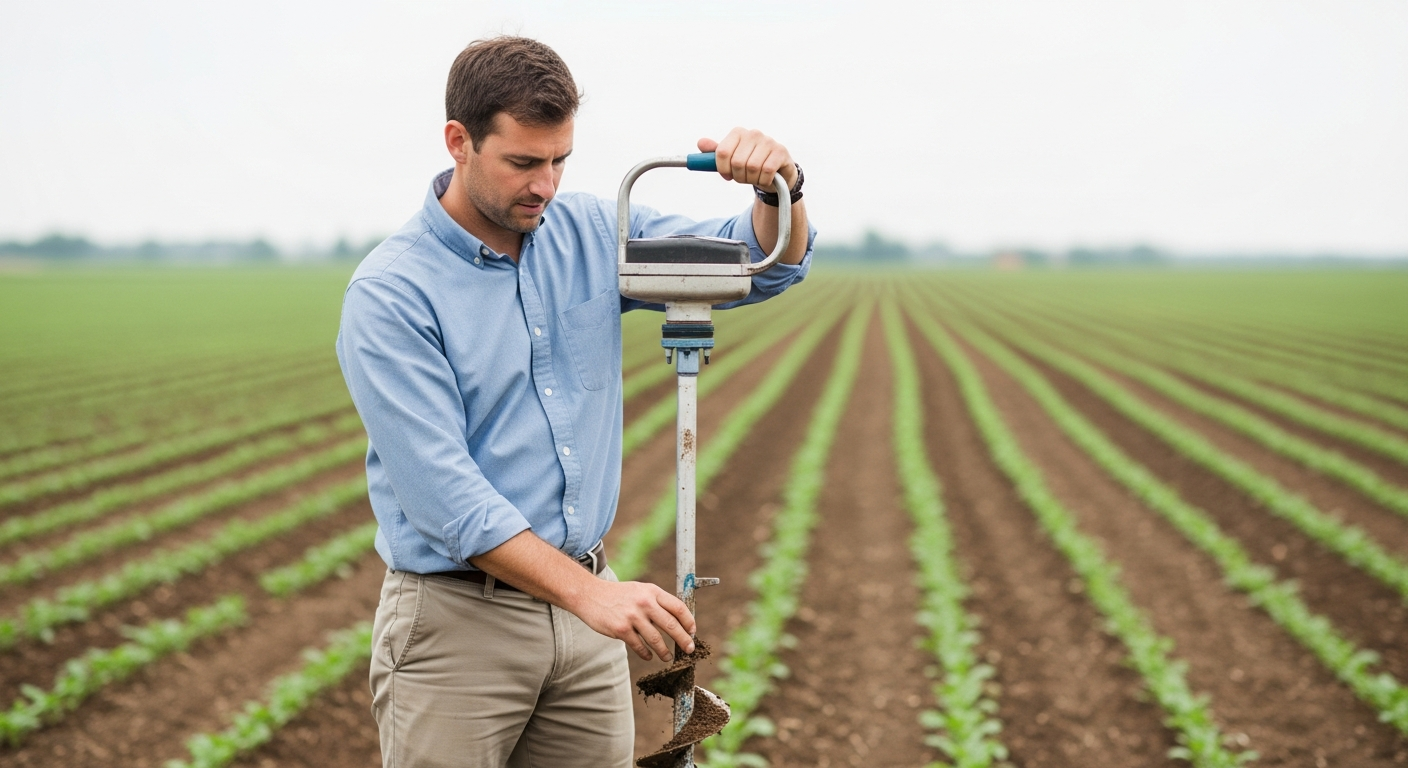
Bucket augers excel in situations where the soil is easily dislodged and needs to be captured efficiently. Their cylindrical shape and open bottom make them ideal for collecting samples from sandy or gravelly soils where a screw auger might struggle to retain the material.
Screw augers, on the other hand, are designed to bore into denser soils. The helical blades effectively cut through compacted layers and bring the soil to the surface, making them suitable for clay soils or soils with a high degree of compaction.
Consider the diameter of the auger as well. A wider auger will collect a larger sample volume, which may be necessary for certain spectroscopic analyses. Smaller diameter augers are easier to maneuver and require less effort to operate, especially in dense soils.
Manual augers are suitable for smaller sampling projects and when portability is a key consideration. Power augers can significantly increase efficiency when collecting a large number of samples, but they are heavier and require a power source.
Before selecting an auger, assess the soil conditions in your field. This will help you choose the most appropriate tool for the job and ensure that you collect representative samples.
Proper Auger Sampling Techniques
Once you have selected the right auger, it’s important to use proper sampling techniques to ensure the accuracy of your soil spectroscopy results. Consistent and careful sampling will minimize variability and provide a more reliable representation of your field’s soil properties.
Begin by clearing any surface debris, such as leaves or rocks, from the sampling location. This prevents contamination of your sample and ensures that you are collecting soil that is representative of the area of interest.
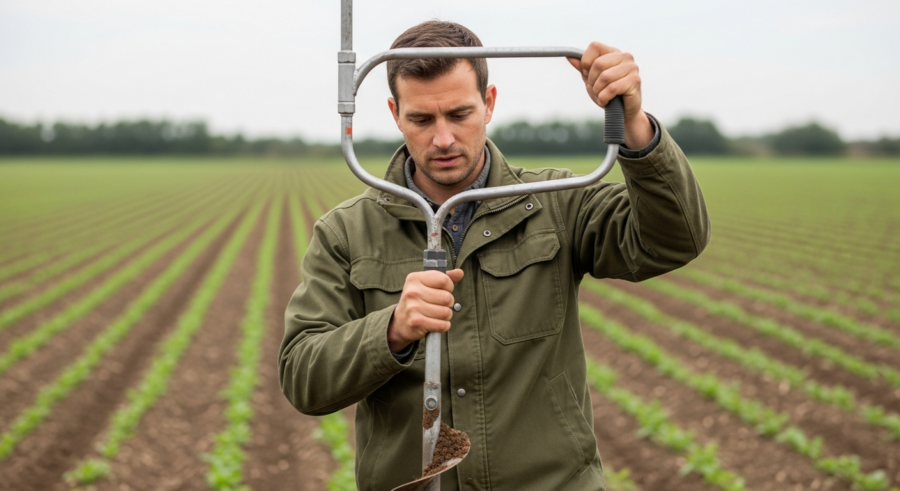
Insert the auger into the soil at a consistent angle, usually vertical, unless you are targeting a specific soil horizon. Rotate the auger clockwise, applying gentle pressure to advance it into the soil to the desired sampling depth.
Once you reach the target depth, stop rotating and carefully withdraw the auger from the soil. Avoid scraping the sides of the hole, as this can mix soil from different depths and compromise the integrity of your sample.
Transfer the soil sample from the auger to a clean container, such as a plastic bag or sample jar. Label the container immediately with the date, time, location, and any other relevant information for traceability.
When inserting the auger, maintain a steady and consistent pressure. Avoid forcing the auger into the soil, as this can compact the sample and alter its properties. A smooth, controlled insertion will yield a more representative sample.
If you encounter resistance while inserting the auger, such as a rock or a hardpan layer, stop and relocate the sampling point slightly. Trying to force the auger through an obstruction can damage the tool and compromise the sample.
When extracting the auger, rotate it gently in the opposite direction to loosen the soil and prevent it from sticking to the sides of the hole. This will help to ensure that you retrieve the entire sample without losing any material.
Before transferring the sample to the container, inspect it for any obvious signs of contamination, such as roots, insects, or debris. Remove any contaminants to ensure that your sample is representative of the soil.
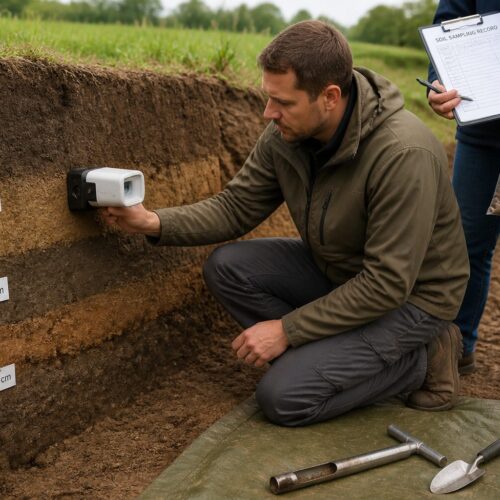
Document the soil profile at each sampling location. Note the color, texture, and structure of the soil at different depths. This information can be valuable for interpreting your spectroscopic data.
Determining Sampling Depth and Location
Determining the appropriate sampling depth and location is critical for obtaining representative soil samples. The depth at which you sample should reflect the root zone of the plants you are growing or the specific soil horizon you are interested in analyzing.
The location of your samples should be based on a systematic grid or a targeted approach, depending on the variability of your field. Understanding these factors will help you collect samples that accurately represent the soil properties across your field.
| Factor | Considerations | Example |
|---|---|---|
| Sampling Depth | Root zone, soil horizon, nutrient distribution | 0-15 cm for surface nutrients, 15-30 cm for deeper root analysis |
| Sampling Location | Field variability, management zones, historical data | Grid sampling, targeted sampling based on yield maps |
| Number of Samples | Field size, variability, desired accuracy | 10-20 samples per hectare for uniform fields, more for variable fields |
| Sampling Pattern | Grid, random, transect | Grid sampling for uniform coverage, transect sampling across a slope |
For example, if you are assessing nutrient availability for shallow-rooted crops, a sampling depth of 0-15 cm may be sufficient. For deeper-rooted crops, you may need to sample at multiple depths, such as 0-15 cm and 15-30 cm, to capture the full profile of nutrient distribution.
When using a grid sampling approach, determine the appropriate grid size based on the size and variability of your field. Smaller grid sizes will provide more detailed information but require more sampling effort.
If you are using a targeted sampling approach, identify areas of interest based on visual observations, yield maps, or other data sources. Focus your sampling efforts on these areas to capture the variability in soil properties.
Consider the topography of your field when determining sampling locations. Soil properties can vary significantly across slopes, so sample different slope positions to capture this variability.
Take into account any historical management practices that may have affected soil properties. For example, areas that have been heavily fertilized or irrigated may have different soil properties than areas that have not.
Consult with a soil scientist or agronomist to determine the most appropriate sampling depth and location for your specific situation. They can provide valuable guidance based on their expertise and knowledge of local soil conditions.
Avoiding Contamination During Auger Sampling
Contamination can significantly affect the accuracy of soil spectroscopy results. It is essential to take precautions to avoid introducing foreign materials into your samples during the auger sampling process.
Ensuring a clean sampling environment and using appropriate tools will help minimize the risk of contamination and maintain the integrity of your samples. Here are some key steps to prevent contamination during auger sampling.
Always use a clean auger and sampling containers. Wash your auger thoroughly with water and a mild detergent before each sampling session, and rinse it well to remove any residue.
Avoid sampling near areas that may be contaminated, such as roadsides, fertilizer storage sites, or areas with recent spills. These areas may contain elevated levels of certain elements or compounds that could skew your results.
Wear clean gloves while sampling to prevent contamination from your hands. Change gloves between samples if you are sampling in different areas or if you suspect contamination.
Be mindful of cross-contamination between samples. If you are sampling in an area with known contamination, take extra care to avoid transferring contaminated soil to other sampling locations.
Use dedicated sampling tools and containers for each sampling location. Avoid using the same tools or containers for different areas, as this can lead to cross-contamination.
When cleaning your auger, use a brush to remove any soil particles that may be stuck to the surface. Pay particular attention to the threads of the auger, as these can trap soil and contaminants.
Avoid placing the auger or sampling containers on the ground, as this can expose them to contaminants. Use a clean surface, such as a plastic sheet or a table, to keep your tools and containers clean.
If you suspect that a sampling location may be contaminated, collect a separate sample from that location and label it accordingly. This will allow you to analyze the sample separately and determine the extent of the contamination.
Document any potential sources of contamination in your sampling notes. This information can be valuable for interpreting your spectroscopic data and identifying any potential biases.
Preparing Auger Samples for Spectroscopic Analysis
Proper preparation of auger samples is crucial for obtaining accurate and reliable spectroscopic data. The goal of sample preparation is to create a homogeneous and representative sample that is suitable for analysis.
This typically involves drying, grinding, and sieving the soil to achieve a consistent particle size. Following these steps carefully will ensure that your spectroscopic measurements accurately reflect the soil properties of interest.
- Air-dry soil samples to remove moisture
- Crush large aggregates into smaller pieces
- Grind the soil to a fine powder
- Sieve the soil to remove large particles
- Store prepared samples in airtight containers
First, air-dry the soil samples to remove excess moisture. Spread the soil in a thin layer on a clean surface and allow it to air-dry at room temperature for several days, or until it is completely dry.
Avoid drying the soil samples in direct sunlight or at high temperatures, as this can alter their chemical properties. A slow, gradual drying process is best for preserving the integrity of the samples.
Once the soil samples are dry, crush any large aggregates into smaller pieces using a mortar and pestle or a mechanical grinder. This will help to ensure that the soil is homogeneous and that the grinding process is more efficient.
Grind the soil samples to a fine powder using a ball mill or a similar grinding device. The finer the powder, the more accurate your spectroscopic measurements will be.
Sieve the soil samples to remove any large particles or debris. A sieve with a mesh size of 2 mm is typically used for this purpose.
Store the prepared soil samples in airtight containers to prevent moisture absorption and contamination. Label the containers clearly with the sample name, date, and any other relevant information.
If you are storing the samples for an extended period of time, consider adding a desiccant to the containers to absorb any residual moisture. This will help to prevent the soil from clumping together and ensure that it remains in a fine powder.
Common Auger Sampling Mistakes and How to Avoid Them
Even with careful planning, it’s easy to make mistakes during auger sampling that can compromise the accuracy of your soil spectroscopy results. Being aware of common pitfalls and taking steps to avoid them will help you collect high-quality samples and obtain reliable data.
Here are some common auger sampling mistakes and strategies for preventing them. By learning from these common errors, you can improve your sampling techniques and ensure the integrity of your soil data.
One common mistake is inconsistent sampling depth. Make sure to measure the depth of each sample to ensure that you are collecting soil from the intended horizon.
Another mistake is inadequate sample mixing. Thoroughly mix the soil from each sampling location to create a representative composite sample.
Failing to properly label samples is another frequent error. Always label your samples immediately after collection with the date, time, location, and any other relevant information.
Ignoring potential sources of contamination is also a common mistake. Be mindful of potential contaminants and take steps to avoid introducing them into your samples.
Using the wrong type of auger for the soil conditions is a common error. Make sure to select an auger that is appropriate for the soil type and sampling depth.
Collecting too few samples is another mistake that can compromise the accuracy of your results. Collect enough samples to adequately represent the variability in your field.
Failing to properly clean the auger between samples can lead to cross-contamination. Clean the auger thoroughly after each sampling location.
Not documenting the sampling location accurately can make it difficult to interpret your results. Use a GPS device or a detailed map to record the location of each sample.
Improperly storing or transporting samples can alter their properties. Store samples in airtight containers and transport them in a cool, dark place.
Best Practices for Auger Sampling in Varied Terrain
Sampling in varied terrain presents unique challenges that require careful consideration to ensure representative data collection. Changes in slope, aspect, and elevation can significantly impact soil properties, necessitating adjustments to your sampling strategy.
Adapting your approach to account for these variations will improve the accuracy and reliability of your soil spectroscopy results. Here are some best practices for auger sampling in varied terrain.
When sampling on slopes, consider dividing the slope into distinct zones based on elevation and aspect. Sample each zone separately to capture the variability in soil properties across the slope.
Pay attention to drainage patterns in the terrain. Areas with poor drainage may have different soil properties than well-drained areas, so sample them separately.
Use a GPS device to accurately record the location of each sample. This will allow you to create a detailed map of soil properties across the terrain and identify areas of concern.
Increase the number of samples in areas with high variability. This will help to ensure that your data is representative of the entire area.
Consider using a stratified sampling approach, where you divide the terrain into different strata based on slope, aspect, or elevation, and then sample randomly within each stratum. This can help to ensure that you are capturing the full range of soil properties across the terrain.
Pay attention to the direction of the slope. South-facing slopes tend to be drier and warmer than north-facing slopes, which can affect soil properties.
Consider the presence of any microclimates in the terrain. These are small areas that have different climatic conditions than the surrounding area, such as shaded areas or areas near water bodies. Microclimates can significantly affect soil properties.
Be aware of the potential for soil erosion in steep terrain. Eroded areas may have different soil properties than non-eroded areas.
Consult with a soil scientist or geologist to get expert advice on sampling in complex terrain. They can help you to identify the key factors that are affecting soil properties and develop a sampling strategy that is appropriate for the specific terrain.
Integrating Auger Sampling with Remote Sensing Data
Combining auger sampling with remote sensing data can provide a more comprehensive understanding of soil properties across a field. Remote sensing techniques, such as satellite imagery and aerial photography, can provide valuable information about vegetation cover, soil moisture, and other factors that influence soil properties.
Integrating this data with auger sampling results can help you to create more accurate soil maps and optimize your management practices. Here’s how to effectively integrate auger sampling with remote sensing data.
Use remote sensing data to identify areas of high and low vegetation cover. Target your auger sampling efforts in these areas to capture the range of soil properties across the field.
Correlate remote sensing data with auger sampling results to develop predictive models of soil properties. These models can be used to estimate soil properties in areas where you have not collected samples.
Use remote sensing data to monitor changes in soil properties over time. This can help you to identify areas that are degrading or improving and adjust your management practices accordingly.
Validate your remote sensing data with auger sampling results. This will help to ensure that your remote sensing data is accurate and reliable.
Use remote sensing data to identify areas with different soil moisture levels. Soil moisture can significantly affect soil properties, so target your auger sampling efforts in areas with different moisture levels.
Integrate remote sensing data with your soil maps to create more detailed and accurate maps of soil properties. This can help you to optimize your management practices and improve crop yields.
Use remote sensing data to identify areas with different soil types. Soil type is a key factor that affects soil properties, so target your auger sampling efforts in areas with different soil types.
Consider using drone-based remote sensing to collect high-resolution data about your field. Drones can provide more detailed information than satellite imagery or aerial photography, which can be valuable for precision agriculture.
Consult with a remote sensing specialist to get expert advice on integrating remote sensing data with auger sampling results. They can help you to select the appropriate remote sensing techniques and develop a strategy for integrating the data with your soil sampling efforts.
Sample Storage and Transportation for Spectroscopy
Proper sample storage and transportation are critical for preserving the integrity of soil samples collected for spectroscopic analysis. Changes in temperature, humidity, and exposure to light can alter the chemical and physical properties of the soil, leading to inaccurate results.
Following best practices for storage and transportation will minimize these changes and ensure that your spectroscopic data accurately reflects the soil conditions at the time of sampling. Here are guidelines for sample storage and transport.
Store samples in airtight containers to prevent moisture loss or contamination. Use plastic bags or sample jars that are specifically designed for soil sampling.
Keep samples in a cool, dark place to minimize changes in soil properties. Avoid exposing samples to direct sunlight or extreme temperatures.
Transport samples in a cooler or insulated container to maintain a stable temperature. This is especially important if you are transporting samples over long distances or in hot weather.
Ship samples to the laboratory as soon as possible after collection. This will minimize the time that the samples are exposed to potentially damaging conditions.
If you are unable to ship samples immediately, store them in a refrigerator or freezer to slow down any chemical or biological activity. This can help to preserve the integrity of the samples for a longer period of time.
When shipping samples, pack them carefully to prevent damage during transit. Use bubble wrap or other packing materials to protect the containers from being crushed or broken.
Include a chain-of-custody form with your samples. This form should document the date and time of collection, the location of the samples, and the name of the person who collected them. This will help to ensure that the samples are properly tracked and handled throughout the analysis process.
Notify the laboratory in advance that you are shipping samples. This will allow them to prepare for the arrival of the samples and ensure that they are processed promptly.
Choose a reputable shipping company that has experience handling soil samples. This will help to ensure that your samples are delivered safely and on time.
Conclusion
Accurate auger sampling is the foundation of reliable soil spectroscopy for precision agriculture. By choosing the right auger, using proper sampling techniques, and avoiding common mistakes, you can collect high-quality samples that provide valuable insights into your soil’s health and composition.
Remember to carefully prepare your samples for analysis and store them properly to preserve their integrity. Integrating auger sampling with remote sensing data can further enhance your understanding of soil variability across your field.
With these techniques, you’ll be well-equipped to use auger sampling soil spectroscopy to improve your soil management practices and optimize crop production. Embracing these methods will lead to more informed decisions and sustainable agricultural outcomes.
By consistently applying these best practices, you can unlock the full potential of soil spectroscopy. This will enable you to make data-driven decisions that improve soil health and enhance agricultural productivity.
The insights gained from accurate soil analysis will empower you to tailor your management strategies to the specific needs of your field. This will lead to more efficient use of resources and improved environmental sustainability.
Ultimately, mastering auger sampling techniques for soil spectroscopy is an investment in the long-term health and productivity of your land. It’s a step towards a more sustainable and profitable future for agriculture.