
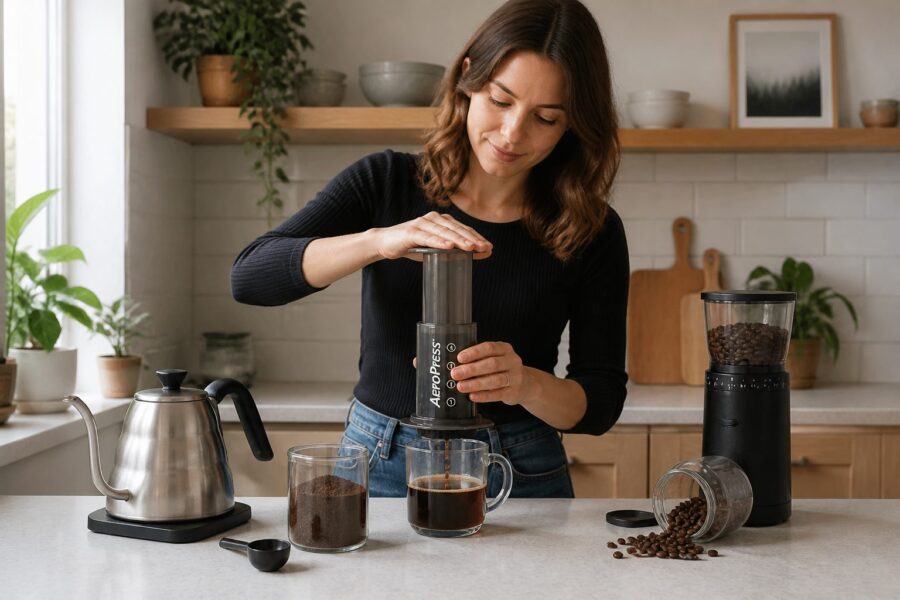
Learning how to use an AeroPress starts with recognizing its chamber, filter cap, and plunger.
A basic routine is easy to learn, but recipes vary, so the instructions for your specific model should guide setup and safe use.
This guide explains the parts, the sequence of a typical brew, and what to check when pressing feels difficult.
It does not prescribe one dose, water temperature, or steep time as the only correct recipe.
Know the main parts before brewing
The brew chamber holds the coffee and water, while a filter sits in the cap attached to its base.
A plunger fits into the chamber and moves downward to press brewed coffee through the filter and into a mug.
The exact pieces and accessories depend on the model.
Some versions include a scoop, stirrer, paper filters, or a travel cup, so identify what came with your brewer before following an online recipe.
AeroPress’s official instructions provide model-specific guidance for assembly and use.
Read them before brewing, especially if your device differs from a standard Original model or includes a special cap or filter.
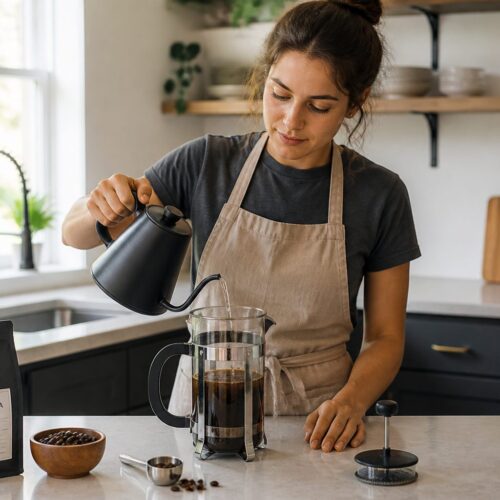
The brewer is not the same as a French press.
Both have plungers, but an AeroPress filters liquid through a cap as it is pressed, while a French press uses a mesh screen to separate grounds after immersion.
Set up a straightforward brew
- Place the filter in the cap as directed for your model, then attach the cap securely to the chamber.
- Set the brewer over a stable mug or vessel that can safely support it.
- Add coffee using a recipe intended for your AeroPress model and chosen filter.
- Pour in the recipe’s water amount and follow its directions for stirring or steeping.
- Fit the plunger and press steadily, keeping the brewer and cup stable.
- Remove the cap and clean the used grounds and parts according to the manual.
These are the general stages, not a fixed recipe.
The amount of coffee, grind, water temperature, steep duration, filter type, and pressing style all change among recipes.
Check that the cap is fully attached before adding water or pressing.
A loose connection can allow leakage, so do not hold the brewer over an unstable or delicate cup.
Use a mug with a broad, steady base and a surface that does not wobble.
Keep fingers clear of the hot brew and avoid pressing over a vessel that could tip.
Choose a recipe and adjust one variable at a time
Begin with a recipe from the manufacturer or another source that gives clear instructions for the model you own.
Follow it once before changing anything so you have a baseline for comparison.
If the cup tastes thin, you might test a different coffee amount or a smaller final volume in a later brew, within the brewer’s instructions.
If it tastes harsh, adjust one variable such as grind or steep time rather than changing everything together.
A finer grind can change resistance during pressing, while grind size also affects extraction.
Do not assume that finer always produces a better cup; use the recipe as a starting point and make gradual changes.
Water temperature and brewing time matter, but there is no single setting that suits every coffee and preference.
Follow the chosen recipe and note what changed when you compare one cup with another.
Paper and reusable filters may produce different results and have different care needs.
Confirm that a filter fits your cap and follow the filter maker’s cleaning instructions if it is reusable.
Press gently and respond to resistance
The plunger should move with controlled pressure rather than requiring a sudden shove.
Keep the device upright and press slowly, stopping if the setup feels unstable or resistance seems abnormal.
If pressing is difficult, do not force the plunger.
Check whether the grind is unusually fine, the chamber is overfilled, or the filter and cap are fitted correctly, then consult the recipe and manufacturer instructions.
The way you press can affect flow, but pressure is not a contest.
A steady motion gives you more control and reduces the chance of tipping the cup or splashing hot coffee.
Some recipes use an inverted setup, but that changes assembly and handling.
It is not necessary for a basic brew, and beginners should follow the official model instructions before trying a method that holds liquid above an unsecured cap.
If a seal, filter cap, or plunger looks damaged, stop using the brewer until the part is inspected or replaced according to the manufacturer’s guidance.
How the AeroPress differs from a French press
A French press usually combines grounds and water in a carafe, then uses a metal mesh plunger to separate them.
An AeroPress pushes liquid through a filter attached to the chamber, so the brewing and cleanup sequence differs.
The filtered cup can feel different from a French press brew, but that does not make one method universally better.
Preference depends on body, clarity, convenience, and the coffee being used.
A French press is commonly brewed as an immersion batch and can serve more than one person, depending on its size.
The AeroPress is generally used for a smaller brew in its chamber, though recipes and model capacities vary.
The shared plunger can make the devices look similar at a glance.
Their filter design and workflow are the useful distinctions to remember when choosing a recipe.
Clean and store the brewer
After brewing, remove used grounds and the filter in the way the manual recommends.
Rinse the parts that are intended to be rinsed, and avoid immersing or heating components unless the instructions permit it.
Some models allow the plunger to push a compact puck of grounds out through the cap, while filter type and setup can change cleanup.
Use the procedure for your device rather than forcing parts apart.
Let components dry as directed before storage.
Keeping the brewer clean and dry helps prevent old coffee residue from affecting the next cup.
Do not use abrasive cleaners or put parts in a dishwasher unless the manufacturer says they are dishwasher-safe.
Materials and accessories differ between models.
Common first-brew problems
- A leak may point to an unsecured cap or a setup that does not match the model instructions.
- A slow press may call for checking grind, coffee amount, and filter placement rather than applying more force.
- A weak cup may reflect the chosen recipe, serving volume, or taste preference rather than a defect.
- A muddy cup can result from filter choice, grind, or technique; compare one change at a time.
- Difficulty removing a part is a reason to pause and consult the manual, not to twist harder.
Keep a small note of the recipe and what you would change next time.
A simple record of coffee, grind, water, and impression is enough to make experimentation more useful than guessing.
Once the basic sequence feels familiar, recipes become easier to compare.
The most reliable habits are careful setup, a stable mug, a controlled press, and model-specific care.
Questions readers ask
Set up the chamber and filter according to your model’s instructions, add coffee and water using a chosen recipe, allow the stated brew time, then press gently into a stable mug and clean the parts as directed.
A press that feels unusually resistant can relate to grind, coffee amount, filter setup, or technique; stop forcing it and check the model instructions and recipe before trying again.
No. Both use a plunger, but an AeroPress pushes brewed coffee through a filter, while a French press typically separates steeped grounds with a mesh plunger inside its carafe.